Over 1 million freelancers and 25 million large and small businesses use PayPal to send invoices and collect payments through a PayPal business account. If you're a new freelancer looking for an easy way to create and send professional invoices, PayPal invoicing will be an ideal choice.
In this guide, we'll cover:
- How PayPal invoicing and the PayPal invoice generator works
- Benefits and costs of PayPal invoicing
- 8-step process to create PayPal invoice templates
We'll also talk about some useful PayPal business account invoicing features like ways to send invoices, templates, Address Book, and Recurring Series.
An Overview of PayPal Invoices and How They Work
PayPal is an online payment service provider that allows individuals and businesses to create and send invoices and send and receive payments. PayPal offers a secure platform where a user's linked bank account and credit or debit card can be used to perform transactions to get paid faster.
PayPal has an invoicing feature. It has customizable templates you can use to make and send invoices to clients. You can also save invoice templates and reuse them every time you need to send an invoice.
When you make an invoice, PayPal gives you a shareable invoice link. Your clients can click on the link and make the payment. PayPal allows you to create and send an invoice from the PayPal website or PayPal Business app.
You can integrate PayPal with an order management system and custom billing apps to send an invoice directly to avoid unpaid bills.
Paypal invoicing allows for all invoices to be paid online, or for the customer pays offline and you record the payment later. There are also features like recurring invoices.
Benefits of PayPal Invoicing
PayPal is the go-to invoicing and payment platform for many freelancers. It's powerful, easy to use, and reliable. Let's look at some key features and benefits of using PayPal to create a professional invoice for your clients.
- Pre-made, customizable template
- Create quick invoices with a due date
- Easily create invoices on the go
- Scheduled and recurring invoices
- Add an invoice date
- PayPal enables you to add shipping costs
- Support for 200+ markets worldwide
- Supports partial payments
- Follow up with clients and send payment reminders
- Get notified when any bills and payments get paid
- Record customer payments and see the history of each bill
- Integrate with other apps using PayPal invoicing APIs or accounting software
Is PayPal Invoicing Software Free?
PayPal is a completely free tool, and you don't need to pay any monthly fixed fee to use it. You can create and send unlimited invoices to clients for free. However, you need to pay a transaction fee when your invoice is paid.
For US-based transactions, the transaction fee is 2.99% + $0.49 per transaction for accepting credit card/debit card payments and 3.99% + $0.49 per transaction for PayPal digital payments. For international transactions, the fee is 4.4% plus a flat fee depending on the currency. The fee can vary based on the payment method and your PayPal plan, but there are no monthly fees.
Compared to other transaction fees, small business owners pay fees which are higher. But it is a fixed fee and easy to calculate. The transaction fee comes directly out of the payment, and not from your PayPal balance at a later date.
How to Create a PayPal Invoice?
Having discussed the benefits and fees of PayPal Business invoicing and how it works, let's look at a step-by-step process to creating a PayPal invoice. If you have already added your business information, inventory, and clients/customers, jump to the 6th step.
1. Log Into Your PayPal Account
First things first, you need to log into your PayPal account. If you don't have one, you can sign up. It's free. Though you can use PayPal's invoice template generator without logging in, you won't get all the features. Therefore, it's better to create an account. Once your account is ready, make your first invoice and enter all the necessary invoice details.
2. Head to the Invoice Dashboard
Click on the Invoicing button on the dashboard. If you can't find the option, look for "Paid and Get Paid" on the top bar and select "Create and Manage Invoices." You'll be redirected to an invoice generator page.
3. Add Your Business Account Information
Before creating an invoice, you'll need to add your business and contact info. Your invoice includes the following:
- Company logo and name
- First and last name
- Email address
- Phone number
- Website
- Address
- Tax ID
If you're entering this information for the first time, just fill in the mandatory information and proceed further. You can later return to this section and enter the remaining information.
4. Add the List of Items
The next step is to add an inventory. Here, you need to add the services rendered to a client and their prices. PayPal also allows you to enter these items manually. If you offer specific services at set prices, you can use the inventory feature. If your services rendered and prices aren't fixed, you can add items manually.
When you add an item, you need to enter the following information:
- Item name
- Description
- Price
- Currency
- Tax
Please note that you need to repeat this step for every new item you add.
5. Add Your Clients
Next, head to the Address Book section and add clients. In the Address Book, you can create a new contact or customer and save their customer details like:
- Name and business name
- Email address
- Shipping and billing address
- Phone number
You can add a client or customer manually as well. However, if you work with recurring clients, it's best to add them to your address book. This way, you won't need to add their details every time you send them an invoice.
6. Create an Invoice
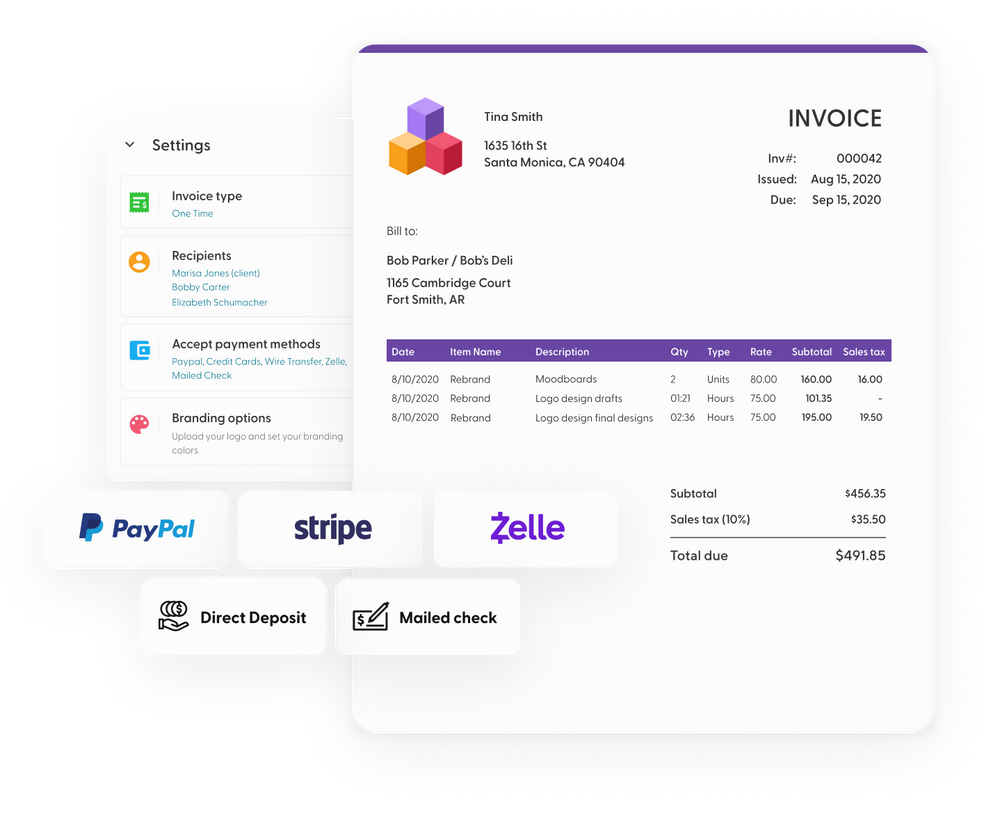
Once you have entered all the information discussed above, you can create an invoice. In order to create a PayPal invoice, you'll need to add the following information:
- Bill To: Select a contact from your address book to whom you want to send the invoice. You can also add a contact manually.
- Templates: Choose a different invoice template if you want to.
- Company Info: Your default business information (added in the 3rd step) will show here. You can change it if needed.
- Items: Select the items you want to bill the client for. You can import them from the inventory or add them manually.
- More Options: PayPal allows you to add up to 5 attachments. If you want to add extra information, you can send them as attachments with your invoice.
- Message to Customer: If you want to add a note or message for your client, you can add it here.
- Invoice Information: Add the invoicing number, date of creation, discounts, shipping charges, and other payment terms.
- Payment Options: Include all the payment options you allow, such as partial payment, installments, etc.
7. Preview Your Invoice and Send It
After adding all the information in the invoice form, review it thoroughly. Sending invoices with errors is the last thing you want to do. Doing so will not only delay the payment but will also leave a poor impression on the client. So, check for any spelling, numerical, currency, and other mistakes so you can get paid faster.
If you're satisfied with the invoice, get a shareable link for it. You can now send this link to your client using their customer email address, or through MS Teams, Skype, WhatsApp, or wherever you communicate with your client.
8. What's Next: Sending Reminders, Getting Paid, and More
There are a few things you can do from your PayPal dashboard after sending the invoice. You can edit it, cancel it, or archive it. You can also send reminders to your clients if they don't pay by a future date or the final due date.
If a client pays outside of PayPal, you can record the payment in your PayPal dashboard. Once a client pays, PayPal automatically records the transaction and transfers the fund to your PayPal account so you get paid.
The Invoicing section also has a Recurring Series option where you can set up recurring invoices for repeat clients. You can schedule the invoice by adding the date and time at which you want the invoice to be sent each month to the client. This send reminders option is a very useful feature to have if you expect to receive payment regularly from clients.
Conclusion
PayPal is the most popular online invoicing and payment platform for freelancers and SMBs. Using its ready-to-use templates, you can create and send professional, customizable invoices in just a few minutes. It's completely free to use, and you only need to pay for the transaction fees.
Indy's invoice tool integrates with PayPal, allowing you to create and send PayPal invoices directly from the Indy dashboard.
Frequently Asked Questions
Does it cost money to create an invoice on PayPal?
PayPal has a free invoice generator tool, and you don't need to pay any money to create an invoice on PayPal. However, PayPal charges a transaction fee when you receive invoice payments. The fee can vary anywhere between 1.5%-4% of the total invoice amount.
What payment methods does PayPal support?
PayPal has three payment methods:
- Your bank account
- Your credit or debit card of VISA, American Express, Discover, or Mastercard
- Your PayPal Balance
Please note that you'll need to link your bank account or PayPal credit and debit cards to your account if you want to use them.
How do I set up an automatic invoice on PayPal?
To automate your PayPal invoices, head to the Merchant Services section and click on "Create Buttons" and then "Automatic Billing." From there, you can generate an HTML code and place it in your emails or on your websites. Clients can click on the button and reach a payment form to make the payment.
How do I change my PayPal Invoice template?
PayPal's invoice creation form gives you the option to change the template. You can change the default template to a template of your choice. PayPal also allows you to create and manage your own templates using the web UI and Invoicing API.


