

Knowing and understanding how to quickly and accurately insert a handwritten signature in a Word document can enhance your documents and make them more personable. It's totally possible to insert a handwritten signature into any word document. Providing your document with sort of a personal touch as it's sent or used, not to mention also giving it a more professional demeanor.
Here are some reasons to use a Microsoft Office signature line:
- You could use a Word document as a contract or other legal record.
- Signing your Word documents can lock them so they cannot be edited.
- Your signature block can personalize your document.
- A signature in Word documents is like a digital certificate.
- A reusable signature in Word can improve workflows.
With that in mind, let's look at how to add a signature line in Word.
What is a digital signature?
First things first, what actually is a digital signature? Essentially, a digital signature is an electronic signature that has been created solely online and not in a printed version of a document. Sometimes, an electronic signature is one that is mathematically created to validate your authenticity.
Basically, the signature is encrypted to your personal Microsoft Word account, and it verifies that the document is yours and yours only. It hasn't been changed or modified by anyone else. In a world where work can be done from anywhere, being able to confidently insert an authenticated signature image into a document is vital.
Signing certificate and Certificate Authority
Before one can fully understand what a signing certificate is, the asymmetric keys should be understood. In layman's terms, asymmetric keys are used to encrypt the signature. It's an algorithm whose primary goal is to make sure that the signature and any documents it's found on are kept both private and secure as it travels through the web.
There are two different keys that MS Office users will need to get before ensuring that their signatures are encrypted and secure. These are called the private key and the public key. It's sort of self-explanatory what each of these keys does. The private key is the user's personal key, so no one else should know this key. When an MS Office document is created, the creator will sign it with their private key. It will then be sent out, and that's where the public key comes in. When the document is sent to another person, they'll be able to verify it with the public key.
Before authenticating a signature, users will need to validate their private keys and receive their public keys. In order to do that, a digital signature can be purchased and issued through a Certificate Authority. These trusted third-party entities are available on the web. A simple google search should lead you to a trusted and authentic Certificate Authority,
Creating your own digital certificate also isn't that difficult. In this case, though, the signature can not officially be verified or authenticated. Therefore, it's vital that you know and trust this self-signed document.
What does a digital signature guarantee?
Signing with a digital signature guarantees that the Microsoft Word document or other MS Office documents are authentic and overall proof of identity. It can be guaranteed that both the sender and receiver have processed the information, and this can not be denied or changed in the future.
Documents are notarized. As long as the signature has not been tampered with, is valid, and the certificate has not expired, then the document is considered to be notarized. Through the Certificate Authority process, the signer has already provided the required documents to back up their identities, allowing for electronic notarization to confirm the identity.
Signature lines in Word and Excel
Now, let's get down to the actual business of inserting signature lines in MS Office programs. First off, what exactly is a signature line? In essence, it's the same idea of a signature line that has been seen in printed documents for centuries. The difference, though, is that the author sets specific instructions of the signature they expect to receive from the intended signer. There are a few different options that the author can request when they want to select signature line in Microsoft Word documents;
1. Type the signature
2. Add a signature image file
3. Sign through a touch screen feature
Each of these options depends solely on what the author and signer are most comfortable with. None of the three are less or more encrypted and should all be backed by a reputable certificate authority in order to guarantee total authentication and notarization.
Create a signature line in Word or Excel
Alright, now let's get down to business. How the I actually create the signature line or signature box? This part is actually much simpler than one might think, thanks to the signature setup box. After purchasing everything needed to authenticate and legalize the signature process, follow these steps:
Step 1: Locate location for Signature in Word
Decide where you would like to create a signature line. It can be anywhere in an MS Word document or MS Excel sheet. The author decides, so move your cursor to where you would like to insert signature box features!
Step 2: Find the Insert tab in the WOrd document
Find the Insert tab located within your document (this can be found at the top of the page in the menu bar next to file, edit, etc.). If you cannot find it in the menu bar, you can press 'ALT' and I together.
After clicking the Insert tab, find text in the drop-down menu. In the text group there, click Signature Line.
In the list of Signature Line, there may or may not be a variety of different options. In this case, you're going to want to go with Microsoft Office Signature Line.
Step 3: Add a Signature line in Microsoft Word document
The signature setup dialog box will then appear on the screen. This is where the author fills out the specifics of how they would like to set up their signature. At this point, things get super simple and are pretty easy to follow.
Suggested signer: This is where the full name of the intended signer should go.
Suggested signer's title: Also, relatively simple, if the signer has a title, i.e. manager, doctor, etc.
Suggested signer's email address: Totally optional, but if the email address of the signer is needed, add it here.
Instructions on how to insert signature: Write detailed instructions for the signature request. The signature request instructions will help not only walk the signer through but will also protect you in the future.
At the bottom of the electronic signature in Microsoft Word, there is a setup dialog box that has two checkboxes.
Checkbox 1: Allow the signer to add comments in the sign dialog
This is totally up to the author and ultimately depends on the purpose of the document. In some cases, signers may want to add a little blurb about their purpose of signing or something to that extent.
Checkbox 2: Show sign date and signature line
This one might be overall pretty important to add to any document. Expert advice, always check this one. This just ensures that the date the document was signed will appear directly with the signature line.
In the case that one may need additional signature lines, just repeat the above instructions and add a signature line and follow the same process until you are satisfied with the signature line list.
Sign the signature line in Word or Excel
Now, let's move on to the opposite side of the electronic signatures process. In order to officially sign documents, you must follow these steps.
Remember: When you digitally sign documents, you're providing a valid digital certificate and authenticating the Microsoft Word or Excel document. Just as you would if you were to provide handwritten signatures to office documents.
Step 1: Find Signature lines
Once the document has been opened, find and select the signature line, and right-click. If the author has sent the document in protected view (which just means that the document cannot be edited by anyone else), click edit anyway.
Step 2: Drop down Menu
From the drop-down menu, click sign and sign the documents by typing your name in the dialogue box.
Depending on the author's instructions, a scanned signature or handwritten signature may have been requested.
Scanned signature: In order to upload an image of your written signature simply choose, and select image. A Select Signature Image dialogue box will appear on the screen, and you can select the image file directly from there. The image will automatically be uploaded.
Handwritten signature: Using the touchscreen on your Tablet/PC, simply sign your name in the box! That's it, you're finished, and the documents have been signed. Using a drawing tool can be challenging at first, but a draw tool is just like writing on a paper document.
Step 3: Insert a signature
Click sign.
Remember: Always click save throughout the signing process.
Remove digital signatures from Word or Excel
Removing signatures from Word or Excel is just as simple as adding them.
Open the document, right-click the signature line, click remove the signature, then click yes.
Invisible digital signatures in Word, Excel, or PowerPoint
Invisible digital signatures are just an added option to add more privacy to the document. These invisible signatures will assure authors of; authenticity, integrity, and document originality.
Add invisible digital signatures in Word, Excel, or PowerPoint
Adding the invisible digital signature is a bit different than the regular signatures. Follow these steps in order to guarantee the successful integration of an invisible digital signature into your document.
Click the File tab → Click info → Click Protect Document, Protect Workbook, Protect Presentation → Click Add Digital Signature → Click OK → Type the purpose for signing in the sign dialog box → Click Sign
Adding an invisible signature to a document will automatically authenticate the document as being the sole property of the author. If this is the case, the document will then become read-only, and modifications cannot be made.
Remove invisible digital signatures from Word, Excel, or PowerPoint
In order to remove the invisible digital signature, follow these steps:
Open the document → Click File → Click Info → Click View Signatures → The signature pane will appear → Next to the signature name, click the arrow → Click Remove Signature → Click Yes
Why not use Indy instead?
Freelancers don't get paid extra to create proposals, contracts, or invoices, so don't spend hours creating them yourself. A unique quote to always remember when it comes to freelancing and overall entrepreneurship: Don't recreate the wheel.
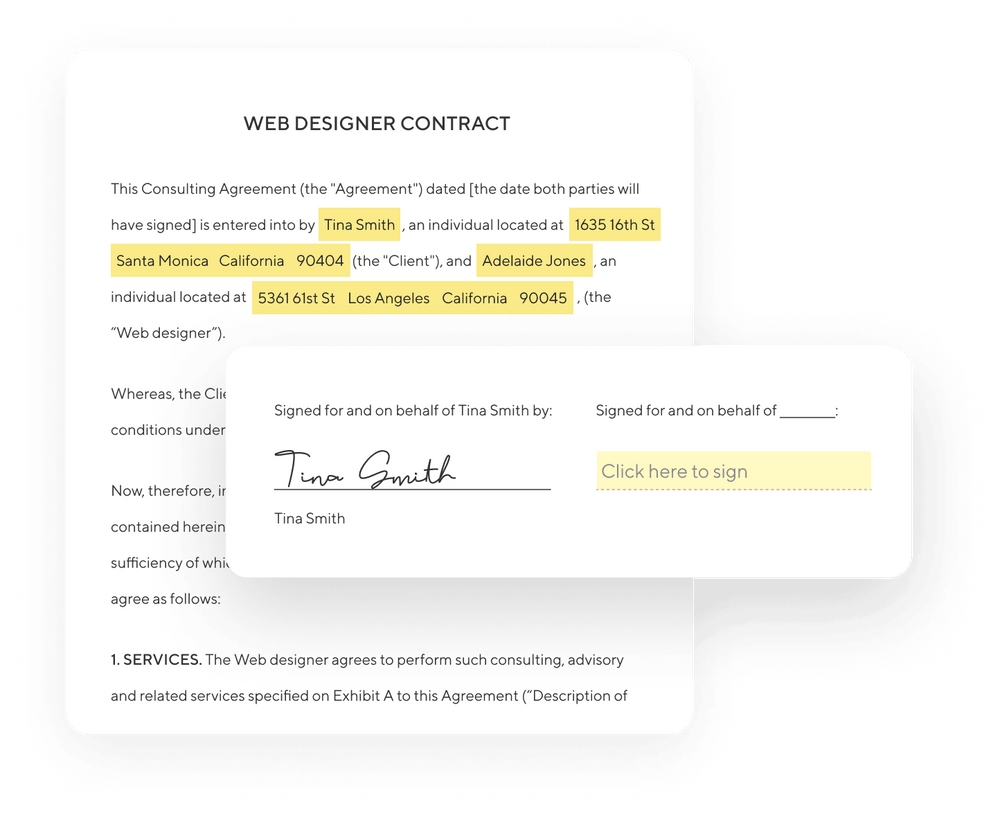
Create Proposals, Contracts, and Invoices
Creating proposals, contracts, and invoices just got so much easier with Indy. Skip all of the steps and authentication requirements that it takes to virtually sign a document using MS Office. Simply switch to Indy.
There are so many templates readily available already, and Indy keeps them all in one place for YOU!
Track signatures automatically
Indy has come fully equipped with a built-in electronic signature feature! Making tracking signatures even easier. Your electronic signature will be auto-generated and can quickly be added to any document you create through the Indy platform.
After the original upload of the electronic signature, it can be saved and will be readily available for use at any time.
THE BEST PART: Your client doesn't have to have an Indy account to sign the documents.
So keep all of your signatures, contracts, and other files in one place! Manage them all together and make use of all of the templates offered by Indy!
Use Indy's Files tool to track client approval
Any independent contractor, worker, or freelancer knows how important client approval and feedback are. How else are people able to trust you?
Well, with Indy's platform, you can quickly get the “thumbs up” you've been waiting for. Add clients as Approvers on your files, and they will be able to quickly and easily provide feedback. This will give independent business owners the chance to get official approval in an easy way.
Not only is it easy to ask for, but it's also super simple to track. Keep everything from your electronic signatures to your contracts, all the way to client feedback on one easy, affordable platform. Check out pricing plans today!
Conclusion
Learning how to add a signature line to your Microsoft Word documents can be a great way to improve the professionalism of your business' output. You can also use the knowledge to request signatures from your clients to improve the flow of contract agreements.
Indy can support your document formatting by adding features that can help track the process, get clients to digitally sign word documents, and store signed Word documents for reference later on. You can try Indy for free today to see how you can improve your workflows.