Microsoft Excel Invoice Template
Still relying on Excel for invoices? It's time to break free from the cumbersome, error-prone, and time-consuming spreadsheets that make your head spin. Experience the power of faster, simpler invoicing with automated reminders, flexible payment methods, and status tracking.
What’s wrong with Excel?
- Too time-consuming
- Risky calculation errors
- Lacks flexibility
- No time tracking
- Limited mobile support

Ditch the outdated, error-filled, and time-consuming templates. Try Indy instead.
Not sure which invoice template is right for you? Compare our easy-to-use Invoice Generator with Word, Excel, and Google Doc to see why our solution is the best choice for your business. With customizable templates, automated calculations, and a sleek design, our Invoice Generator streamlines the invoicing process—saving you time and money.

Ready to get started? Sign up now and get paid fast with invoices that make it easier for clients to pay you.
Not 100% convinced yet?
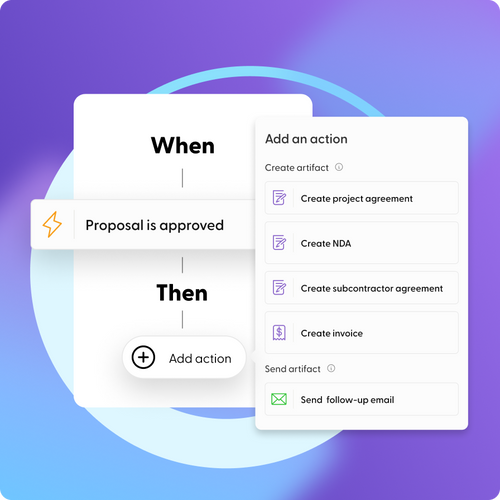
Indy is so much more than an invoicing app. Get all the tools you need to manage your business from start to finish—generate new leads, create contracts, manage tasks, share files, track your hours, and automate your workload: all in one platform.


Win More Clients
Create, customize, and send professional proposals in minutes with an automated Digital Assistant that makes writing an eye-catching proposal as easy as the click of a button.
Protect Your Business
Don’t like writing legal jargon? Keep your work, time, and money protected with legally-vetted contract templates at your service.
Manage Your Projects
Turn complex projects into easy-to-manage tasks with simple yet powerful to-do lists and kanban boards.
Track Your Time
Never miss another minute you should be paid for. Record your time automatically or add time in manually. You’re in control.
Manage It All with Indy
Indy handles the ins and outs of your business. Generate new client leads and send questionnaires. Upload, store, and share files with clients to get feedback. Get a bird’s-eye view of everything due for the day, week, and month ahead. Indy does it all. And now you can too.
100+ invoice templates.
Don’t wait another minute to get paid. Try our fully customizable invoice templates to bill clients at a moment’s notice and get paid faster than ever.
Design Invoice Templates
Protect your work with a customized Design Invoice Templates created for professional designers and creators.
Freelance Invoice Templates
Create a professional freelance invoice in minutes with no design or accounting training
General Invoice Templates
Create a professional invoice in minutes with no design or accounting training
Business Invoice Templates
Create a professional invoice in minutes with no design or accounting training
Consulting Invoice Templates
Create a professional invoice in minutes with no design or accounting training
Creative Invoice Templates
Create a professional invoice in minutes with no design or accounting training
Entertainment Invoice Templates
Create a professional invoice in minutes with no design or accounting training
Healthcare Invoice Templates
Create a professional invoice in minutes with no design or accounting training
IT Invoice Templates
Create a professional invoice in minutes with no design or accounting training
Legal and Finance Invoice Templates
Create a professional invoice in minutes with no design or accounting training
Marketing Invoice Templates
Create a professional invoice in minutes with no design or accounting training
Other Invoice Templates
Create a professional invoice in minutes with no design or accounting training
Services Invoice Templates
Create a professional invoice in minutes with no design or accounting training
Photography Invoice Templates
Create a professional invoice in minutes with no design or accounting training
Videography Invoice Templates
Create a professional invoice in minutes with no design or accounting training
Writing Invoice Templates
Create a professional invoice in minutes with no design or accounting training
Why Indy?
- Use Indy’s other templates to create brilliant proposals and ironclad contracts.
- Once you enter a client’s information, you can quickly build your entire process for that client, including their proposal, contract, hours worked, invoices, and document approval.
- Find support, build your team, and network with other freelance professionals by creating an Indy profile.

Make a Free Invoice Template with Excel
Indy University
Explore our blog for more info on closing details.